
So if you know me, then you know that I love, love, love the beach, good coffee, and the color aqua/teal/turquoise.
So I had this idea...


and Eric liked the idea. Because he loves, loves, loves the beach, good coffee, and the color aqua/teal/turquoise too. We're good together that way. :-)

You see where I'm going with this, don't you?!


In case you have it in mind to paint your front door, this is how he did it.
- First he removed the door from the hinges, then removed all the hardware (deadbolt, handle, hinges, and kick-plate).
- He cleaned the door with a wash of water mixed with Simple Green.
- While wet, he did a wet sand with 220 grit sandpaper.
- When dry, he wiped it off with tack cloth.
- He then covered the back with painting paper and used duct tape so that it would stick to the sides.
- He used frog tape to tape off the little center window.
- Since the core of our door is wood (the exterior is metal) he attached two screw-in eye-hooks on the top. He was able to run burlap twine through them and then through a larger eye hook that he screwed in to the truss of our woodshed.
- He prepped his painting area with an extra large tarp. (Firewood and farm stuff like his tractor and shavings for the barn are behind the tarp, in case you wondered. :-) )
- We purchased one gallon of Clark + Kensington high-gloss enamel exterior paint. Eric added about 4 oz. of floetrol to it to ensure that it would not clog the paint sprayer nozzle and then create spatter.
A light spray for the first coat. Let it dry for about 30 minutes.
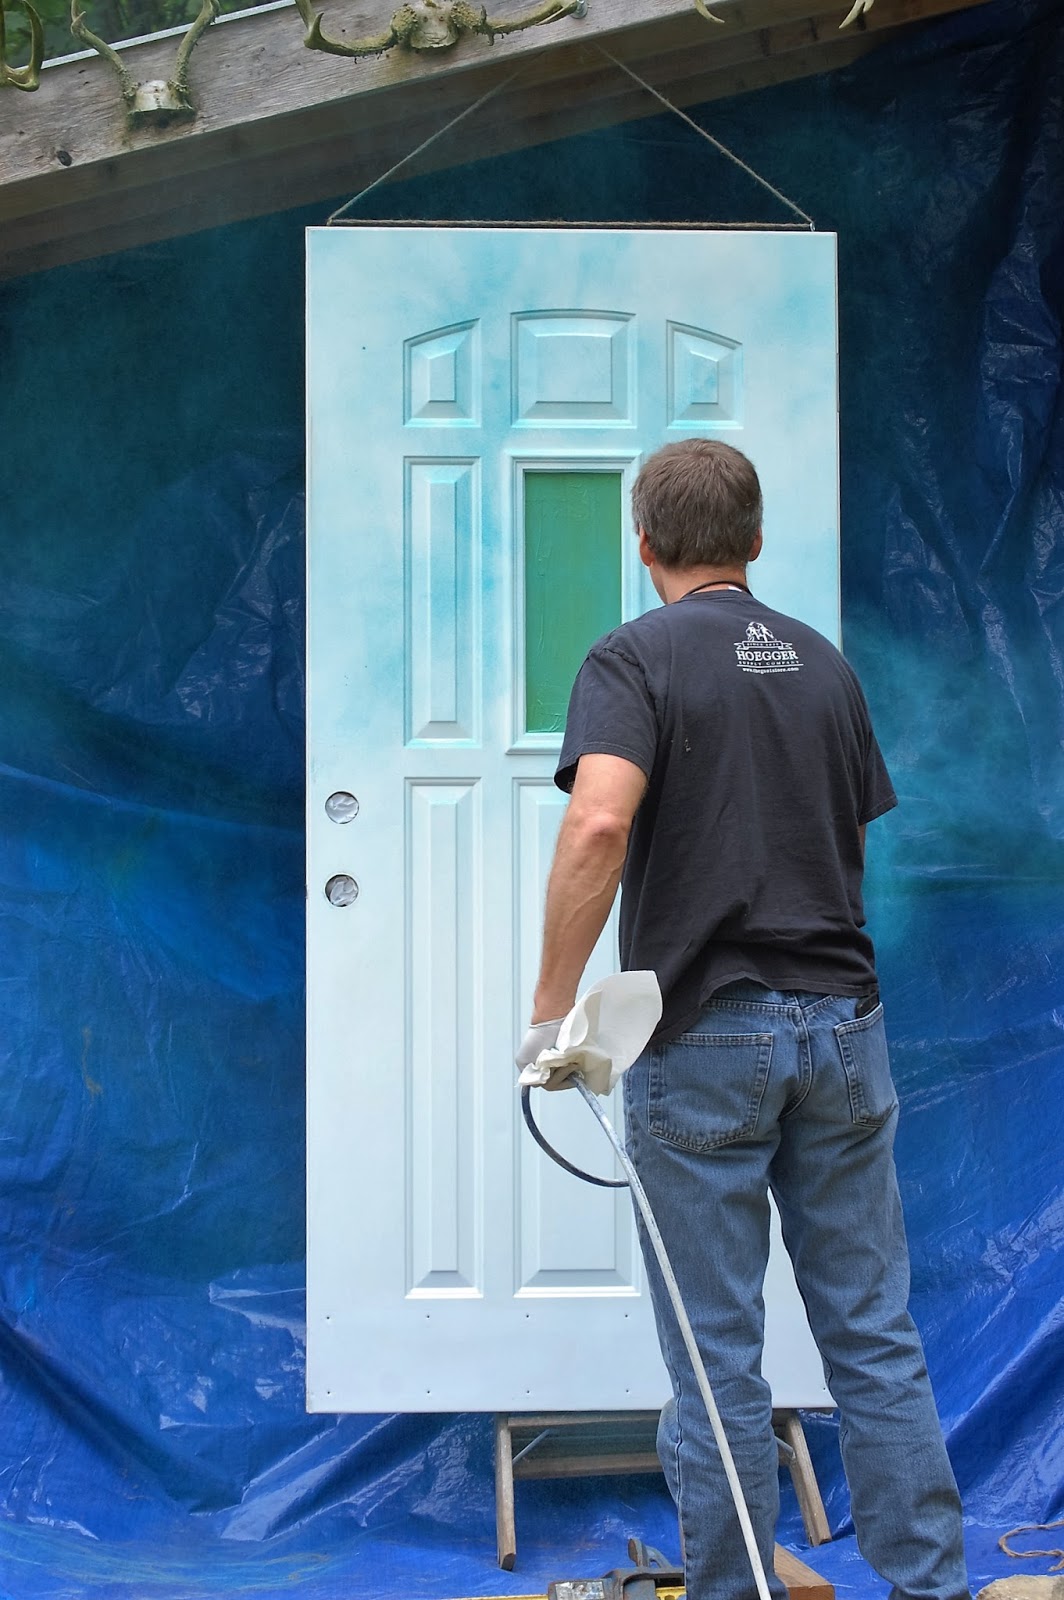

And again.

If you see any blobs of paint, be sure to wipe them off before they dry. You can see below by the white spots on the lower section that he had a few blobs he needed to wipe off.

Continue repeating with light spray - let dry until your door is completely and evenly covered.

Leave undisturbed and let dry several hours before moving to hang.

Remove the paper and tape, hang the door, then reinstall all the hardware.
Finally, stand back and swoon!
Three suggestions:
- Plan for 8-12 hours of project time to allow for ample drying time both in between coats and in the end.
- If possible, do it on a mild-weather day. (Our day was cloudy and about 74.)
- We bought 1 gallon of paint knowing we probably wouldn't need all of it (we used about 1/2) but it is so much easier than trying to work with two separate quarts (running out, remixing with floetrol, avoiding spatter because we ran out...yuk! We'd much rather have a little left over.
HOME. SWEET. HOME

We are so happy with sea-loving, pop of color that defines us.
~ Carol
Sharing with these fine blogs.
Not surprising I share you love of turquoise the door looks great in that colour! It's lovely to meeet you, thank yoiu for leaving me a comment. Sarah X
ReplyDeleteThank you, Sarah, for your kind comment, and for stopping by. :-)
DeleteThis is so FUN XD
ReplyDeleteThank you, Evelyn, you need to come see in person.
DeleteIt's PERFECT. I love it! Just think those toesies will be in the sand very soon!!
ReplyDeleteThank you, e-wife. Have you decided on your door yet? Maybe I'll see that in person?! :-)
DeleteLove it! Great tutorial! Thanks for sharing.
ReplyDeleteThanks so much, Grantham lynn.
DeleteThe colour is gorgeous ♥
ReplyDeletesummerdaisy.net
Aw, thanks Summer.
DeleteThank you for stopping by. :-)
I love how it came out too Carol! It adds some cheery character! :)
ReplyDeleteThank you, JES. I was afraid to change from safe white, but I'm so glad we did it.
Delete